There is something undeniably classic about the manual crank window—the mechanical simplicity, the satisfying tactile feedback, the connection to an era when cars required more physical interaction from their drivers. But let us be honest: after a long day, when you are pulling into your driveway and want to raise both windows before shutting off the engine, reaching across the cabin to crank the passenger side manually grows old quickly. For Third Gen Camaro owners who purchased a base model or simply want to modernize their driving experience, retrofitting a universal power window system is one of the most rewarding upgrades you can undertake. The good news is that General Motors designed these cars with foresight—the door shells are predrilled for both manual and power regulators, meaning the mechanical conversion is largely bolt-in work .
Understanding What the Retrofit Requires
Converting your Third Gen Camaro from manual crank windows to power operation involves three primary tasks: sourcing the correct regulators and motors, running the appropriate wiring, and installing the switches in your center console or door panels. The mechanical portion is surprisingly straightforward. The manual regulator and power regulator mount to the door using the same structural holes, though the power regulator uses a different set of pre-drilled mounting points than the manual unit . When removing the existing manual regulator, you will encounter four 1/4-inch aluminum "peel" rivets that hold the assembly to the door shell. Removing these rivets requires patience—drilling them out carefully with sharp bits is the preferred method, as brute force can damage the door structure . Having an assistant to hold the window glass while you maneuver the regulator in and out is highly recommended, as the glass can shift unexpectedly and become scratched or misaligned .
The Headlight Connection: Power Distribution and Electrical Planning
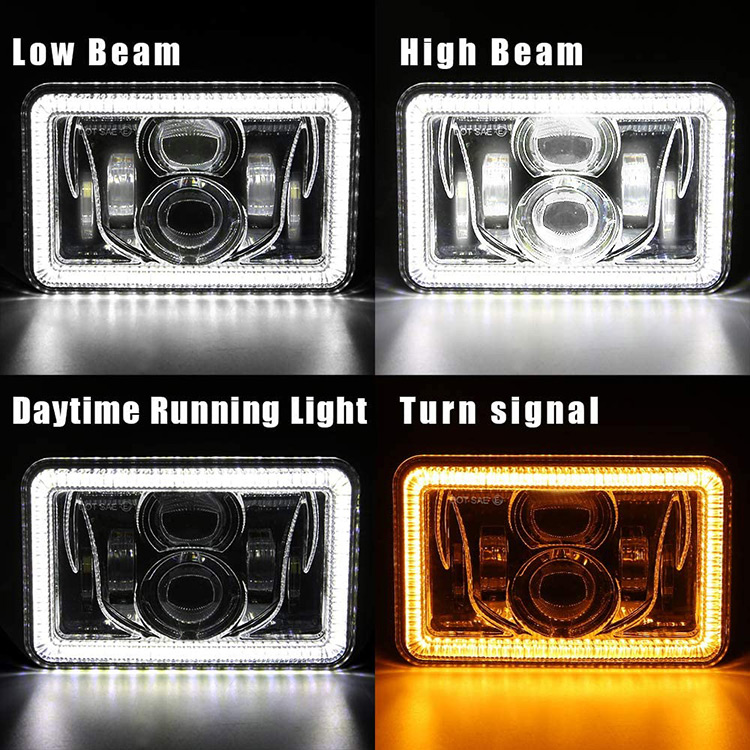
While the mechanical side of a power window retrofit focuses on the doors, the electrical side reaches deep into your Third Gen Camaro's wiring infrastructure—and this is where the headlight system enters the conversation. Power windows require a reliable source of switched 12-volt power, typically drawing through a 30-amp circuit breaker on the factory fuse block . When installing an aftermarket power window harness or building your own, you will need to tap into the car's electrical system at the fuse panel. This presents a golden opportunity to inspect and upgrade the power supply to your headlights as well. The factory headlight wiring on Third Gen Camaros is notorious for voltage drop, resulting in dimmer illumination than the bulbs are capable of producing. While you have the under-dash panel removed to access the fuse block for your window wiring, it is an ideal time to install a dedicated relay harness for the headlights. A relay harness pulls power directly from the battery rather than routing all current through the aging 3rd gen Camaro headlight switch, dramatically improving brightness and reducing the risk of electrical fires from overloaded circuits. This dual-project approach—adding power windows while upgrading the headlight power delivery—maximizes your time spent working under the dash and ensures both systems operate reliably for years to come.
Wiring Options: Factory Harness Versus Universal Kit
When it comes to the electrical side of a power window retrofit, you have two primary paths. The first is sourcing a factory power window harness from a donor Third Gen Camaro at a salvage yard. This approach gives you GM-engineered connectors and a harness designed to fit the car's existing routing channels, including the plastic conduit that runs under the front windshield . However, finding an uncut harness in good condition can be challenging, and you will need to verify that the donor car's fuse block configuration matches your own. The second approach is purchasing a universal power window kit from suppliers like Electric-Life or A1 Electric, which includes new regulators, motors, switches, and a complete wiring harness with instructions . These aftermarket kits simplify the installation process and offer the benefit of brand-new components rather than 30-year-old salvage parts. Some enthusiasts have also combined approaches—using salvaged regulators and motors while constructing their own wiring harness using wiring diagrams available from online resources .
Switch Placement and Console Modifications
One of the most visible aspects of a power window retrofit is where the switches live. Third Gen Camaros equipped with factory power windows have the switches mounted in the center console, just ahead of the shifter . If your car currently has a manual console without the switch cutouts, you have two options: cut rectangular openings in your existing console using a Dremel and files, or source a used console cover plate from a power window-equipped donor car . The switches themselves are readily available from GM dealers or aftermarket suppliers, with subtle cosmetic variations across model years—early cars had black switches with "UP" and "DN" lettering, while later models used symbol-based designs . For those who prefer a cleaner look, some retrofitters opt to mount switches in the door panels, though this requires more extensive modification and custom wiring.
Testing and Final Assembly
Before reassembling your door panels and center console, thorough testing is essential. Connect your power source—whether tapping the IGN slot on the fuse block or using a standalone fuse holder—and verify that both windows operate smoothly in both directions . Lubricate the window tracks with white lithium grease to ensure the new regulators operate quietly and efficiently . If a window moves slowly or hesitates, double-check your ground connections, as poor grounding is the most common culprit in power window installations . Once everything functions correctly, reinstall the door panels with fresh friction clips to replace any that broke during disassembly, and enjoy the modern convenience of power windows in your classic Third Gen Camaro .
|