


How to vinyl wrap a car yourself? |
Posted: August 13, 2022 |
HOW TO VINLY WRAP A CAR YOURSELF - THE FULL BEGINNER FRIENDLY GUIDE.
Considering that over half of all cars are monochromatic shades, it's nothing unexpected you're keen on another look, another variety or finish or something more artistic. For a really long time, the arrangement was a custom paint work, yet the mid-1990s marked a transformation in vehicle customization: vehicle hood wrap.
WHAT IS VINYL CAR WRAP?
Since the 1950s, vinyl was utilized for custom lettering, logos, and decals, yet full car wraps didn't catch on. Then, in 1993, a mundane, yet revolutionary, idea came along: Why not hood wrap a car completely? Germany mandated all taxis be shaded beige, however no place stipulated paint. Kay Premium Marking Films saved the day with a beige vinyl, making practically any vehicle regulation-compliant in only a couple of hours.
Vinyl car wrap is a mix of polyvinylchloride (PVC) polymer, from which "vinyl" comes from, with various additives to make it adaptable, resistant to ultraviolet light, and add tone. These fixings are mixed, cast onto moving sheets, then baked and relieved.
VINYL TODAY.
The subsequent vinyl sheet can be as meager as 2 mil, only two thousandths of an inch thick. After adhesive application, vinyl car wrap sheeting may be cut into smaller rolls, for individual shoppers, or shipped off printers, for custom graphics as straightforward or as complicated as you can imagine.
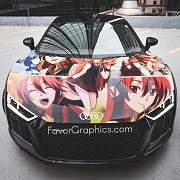
Put most just, vinyl car wrap is adhesive-backed plastic sheeting, yet goodness what we can do with a roll of plastic today! In the last couple of years, we've progressed significantly from strong varieties, and innovators in the car wrap industry have created metallic, intelligent, matte, sparkle, pearlescent, variety changing, even factory-matching and Pantone tones, also beautiful, shocking, and complex patterns and combinations.
Upsides and downsides - VINYL VS PAINT.
In the event that you're thinking about changing the vibe of your vehicle with a paint work or a hood wrap, each has its advantages. A paint work used to be the true standard - after all, it's worked for north of hundred years. A paint work requires a professional's touch, also professional hardware, to get a showroom finish, which drives up the expense and pumps the brakes. Various or special tones, for example, pearlescent or metallic completions, further increases time and expenses. Graphics or custom plans require another specialist's touch, typically hand wrapped up.
Such basic or custom paint occupations last the existence of the vehicle, conceivably decades. From one perspective, such permanence may be desirable, however outlandish combinations can polarize. For a show car with a family, custom paint can dramatically increase its value. Then again, custom paint can significantly lessen its desirability - not every person wants a pink skulls daily driver.
VINYL CAR WRAP TECHNOLOGY.
Thanks to advances in vinyl car wrap innovation, it's as of now not restrictively costly to totally change the vibe of your car, particularly in the event that you plan on doing it without anyone's help. Going the professional course, vinyl car wrapping can cost as much as a paint work, however patience and a steady hand can make even a full car wrap go flawlessly for a do-it-yourselfer. In fact, the tools required are easily accessible and require no special licenses, training, or experience. Basic variety changes, even numerous tones, don't add a lot to the overall expense of the task, yet custom graphics, prints, or completes may increase the expense of materials. In any case, the completed item can particularly daze.
The actual nature of vinyl car wrap fits temporary applications. With legitimate care, a quality car wrap can last five to seven years, perhaps a decade. For permanence, this may be undesirable, however temporary may be ideally suited for certain drivers. Maybe you'll want to change the again search two or three years or you want to sell the car - minimal old ladies may not be excited about those very metal graphics. In either case, eliminating vinyl car wrap just requires a couple basic tools and supplies, and doesn't affect the original completion in the least. In fact, the original paint occupation will be preferable over one of similar vintage, because vinyl car wrap blocks paint-damaging ultraviolet light, maintaining the resale value of your vehicle.
THE DIY FULL CAR HOOD WRAP GUIDE.
Assuming you at any point attempted to apply vinyl lettering or graphics to your car in the past, you probably secured the position troublesome, regardless of whether you prepared the surface and yourself well. Tears, bubbles, stretch marks, and kinks may have persuaded you a full vinyl car wrap to be solidly in the realm of professional installation. A great deal has changed: stronger vinyl, better adhesives, and air-release innovation. Indeed, even a do-it-yourselfer can obtain great outcomes. Ready to begin?
PREPARING TO WRAP YOUR CAR.
1. Consider your canvas, the surface you're wrapping. Is the body and paint work smooth? Minor scratches don't represent an issue, yet chips, imprints, gouges, and rust can cause issues with hood wrap. Assuming the wrap adheres to the deformity, it'll greatly increase its perceivability. In the event that the wrap doesn't adhere to the deformity, it'll air pocket or tear, demolishing the wrap work. Take care of these flaws prior to wrapping your car.
2. Pick a location. You needn't bother with a medical research cleanroom, yet a clean and controlled climate will keep dust free from the wrap. As with paint and body absconds, residue, garbage, and bugs will mar your completion. Clear, vacuum, and mop in the event that you must, and close the ways to achieve a great hood wrap project.
3. Work on a warm day. Vinyl and vinyl adhesive are temperature delicate. The vehicle and wrap ought to be at the same temperature, around 68 °F (20 °C). Colder, and the vinyl become weak and could tear. More sweltering, and the adhesive may activate too aggressively, making it hard to install without a hitch. Utilize a non-contact infrared thermometer to monitor things. It very well may be smart to plan the occupation for an alternate time frame of day or allow all that to acclimate for a couple of hours prior to starting.
4. Gather your tools, supplies, and materials. The average car requires a 25-foot roll of 60-inch wide hood wrap. Narrower rolls are available, however this will require making a seam, an incredible stunt for a beginner. You'll also require grease and wax remover, a general cleaner, 70-or 90-percent isopropyl alcohol, build up free materials or towels, wiper, utility blade, cutting tape, heat firearm, infrared thermometer, and cotton wrap gloves. A clean worktable keeps everything off the floor and diminishes the chance of getting dust. This is a great task with a mate, for holding larger segments of hood wrap and for moral help.
SURFACE PREPARATION and PLANNING. 5. Clean your car. Non-wax car wash items, similar to Turtle Wax MAX Power Wash or Turtle Wax Snow Foam leave a clean surface to which hood wrap will readily bond. Then, clean the whole surface with isopropyl alcohol and build up free fabrics.
6. Eliminate obstacles from the wrap surface. Indeed, you can wrap around a symbol, reflect, entryway handle, antenna, or headlight, yet this greatly increases the trouble and time expected to get a decent hood wrap finish. Save yourself a container of ibuprofen by eliminating obstacles. Yet again go over the encompassing areas with alcohol to eliminate fingerprints or residue.
7. Measure each part you plan on wrapping, adding a couple crawls for handling. Sketch a diagram of your car's body panels and record these measurements for later. Measure two times, add a bit, and cut once. Keep in mind, you can't add material whenever you've removed it! On the off chance that a panel is near or more extensive than your broadest vehicle wrap, you'll have to make a seam. Try not to attempt to wrap a 60-inch hood with 60-inch wrap - you'll miss the mark, guaranteed.
LAYING YOUR FIRST SHEETS OF VINYL.
8. On the off chance that this is your most memorable vehicle wrap project, starting with smaller and flatter segments will assist you with gathering certainty and speed prior to tackling a wide rooftop or etched hood. Utilize your sketch and measurements to decide how much material to cut, utilizing a utility blade.
9. Holding the vinyl in the air - you and your mate wearing cotton gloves - eliminate the backing paper while keeping even pressure on the wrap. This lessens kinks and creases. Carefully lay the hood wrap over the panel, leaving extra material around the edges to manipulate it.
10. Delicately press the vinyl into the focal point of the panel and keep strain on the remainder of the sheet. Utilizing the wiper, start at the middle and work in overlapping strokes toward the edges of the panel. This will drive air out and temporarily adhere the vinyl to the panel.
Squeezing OUT AIR and WRINKLES.
11. Bended surfaces can be especially challenging, compelling a two-dimensional item to adjust to a three-dimensional surface. As you work, on the off chance that you note kinks or air pockets, tenderly strip back the vinyl and apply heat, something like 120 °F (80 °C), and strain to extend it into place. Utilize the wiper again to resolve back from the middle to the edges. While wrapping other things, similar to mirrors, wheels, or inside panels, the same challenges apply. Show restraint to get the stretch right while fitting to bended surfaces.
12. Making seams can also be a challenge, however there are a couple of ways to deal with it. The easiest way is to just overlap one piece of vinyl over another, which requires careful alignment yet no cutting. Kevlar cutting tape is a great development that leaves ideal seams without a blade. Snap blades are the last alternative, a sharp edge to forestall snagging, and be delicate to forestall damage to the hidden paint. EDGING AND FINISHING.
13. An extraordinary completion begins with wrapping the edges of the boards. Utilize the utility blade to manage overabundance material to inside a quarter-inch (2-3 mm) of the edge - irrationally, more prominent edges are more awful. Utilize the intensity firearm to equally warm the edges of the board and hood wrap to no less than 212 °F (100 °C), initiating the glue. Utilize the thermometer to check in any event, warming. Utilize the wiper and your fingers to seal the edge of the vinyl to the board solidly. In the event that warming the vinyl to get it around a sharp bend, be certain the vinyl cools prior to managing.
14. When corners and edges are fixed and set, utilize the intensity weapon on the remainder of the board or piece, no less than 212 °F. This initiates the cement on the remainder of the vinyl for a drawn out bond. Utilize your hands and wiper to solidly bond the hood wrap to the surface. Air pockets might show up at this stage, yet they can be popped securely with a pin or utility edge and pushed down with your fingers. Once more, utilize the thermometer to confirm in any event, warming. Hang tight no less than 12 hours for the glue to set completely.
Step by step instructions to CLEAN HOOD WRAP.
Congrats on your new vinyl vehicle wrap! Dealing with it will assist it with enduring quite a while. Contingent upon the sort and area, a vinyl vehicle wrap can endure as long as a decade. There are three vital stages to keeping your vinyl enclose by incredible condition.
CLEAN and SHINE1. Wash frequently to forestall development of abundance soil and grime. Intense stains could require spot utilization of isopropyl liquor. Turtle Wax MAX Power Wash and Turtle Wax Snow Foam vehicle washes are amazing decisions, safeguarding polished hood wraps up. They additionally forestall right of passage of matte hood wraps up.
2. Delicate cleaning is ideal. Hand washing and drying is the prescribed strategy to keep vinyl clean. Utilize a silicone wiper to eliminate overabundance water prior to drying with microfiber towels. Brush vehicle washes are not suggested, as these can scratch and pull at the edges of your hood wrap. Touchless or brushless vehicle washes are great decisions, and tension washers can be utilized on delicate settings; under 2,000 psi, under 180 °F (80 °C), >40° shower tip, something like 12 inches (30 cm) from the surface, and at right points to the surface.
3. For a display area sparkle, Turtle Wax ICE Spray Wax or Clean and Shine are protected on vinyl surfaces and won't blur or dimness. Clean and wax items can prompt preliminaries and blemish finished vinyl appearances.
The most effective method to REMOVE VINYL FROM YOUR CAR.
In the end, regardless of how you care for it, your vinyl vehicle wrap will debase. A few folds last around 10 years, while others a couple of years. Luckily, eliminating vinyl vehicle wrap is a simple undertaking. All you really want is an intensity firearm and cement remover.
Instructions to REMOVE VINYL FROM YOUR CAR1. Utilize your fingernail or plastic scrubber to pull the wrap from the edges of the whole board. It will look intense, yet it'll be generally gone shortly.
2. Utilize the intensity weapon to equally warm the outer layer of the wrap to around 120 °F (50 °C). This will release the glue so you can pull it off. Utilize a non-contact infrared thermometer to affirm you're not overheating, which can prompt exorbitant cement buildup left on a superficial level.
3. Pull the wrap away from the edges at a precarious point, pulling the wrap back on itself at 15 to 20 degrees. At the point when the wrap gets hard to pull, warm and begin pulling once more.
4. At long last, use Turtle Wax Label and Sticker Remover or Bug and Tar Remover to eliminate any cement buildup from the outer layer of the board.
HOOD WRAP VEHICLE FAQ.
Could I vinyl at any point wrap my vehicle myself?
Totally! Vinyl vehicle wrap can decisively change the vibe of your vehicle, however it just requires a couple of essential instruments, a spotless workspace, and a patient methodology. Could I at any point put my wrapped vehicle through a vehicle wash?
Hand washing is best for hood wraps, however brushless or touchless vehicle washes can be similarly as protected. You might in fact utilize a strain washer on the off chance that you're delicate. Will vehicle wrap harm my vehicle's paint?
In reality, vehicle wrap can safeguard your paint since it blocks harming bright light. At the point when you eliminate it, the first completion will be flawless. How long does hood wrap last?
Contingent upon the nature of the wrap, sort of hood wrap, care taken during introducing, care after establishment, and ecological elements, vehicle wraps can endure from three to a decade. Is there anything you mightn't?
Vinyl vehicle wrap adheres best to smooth industrial facility paints and smooth unbending plastic surfaces. It won't bond well, if by any means, to unfortunate paint occupations, orange strip, profound scratches, gouges, rust, chipped paint, chipping paint, finished surfaces, elastic, ABS plastics, permeable or light surfaces.
|
|||||||||||||||||||||||||
|
|||||||||||||||||||||||||


